How do I connect a sensor to the DASH2 via the DL1?
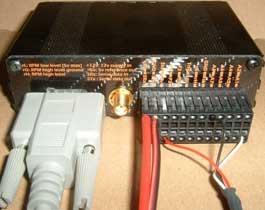
step 1: Wire up the sensor to the block connector that is on the end of the DL1 power cable. The red wire should go to 5v, the black wire to "ground" (GND) and the white wire to signal "Analogue 1" (A1). The orange writing above the connector, on the back of the DL1, will tell you whereabouts the wires should go.
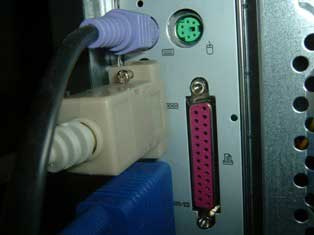
step 2: Using a serial cable, connect the DL1 to your computer.
step 3: Now enter the "Start" menu and navigate your way to the DL1 monitor on the RT software.
step 4: The following window will appear on screen. Select the serial port that you are using and press "Connect"
step 5: This will bring up the "DL1 live monitor". The sensor is wired to "Analogue Channel 1", and, if it is working correctly, this channel should show much higher readings than the others.
step 6: You may now remove the serial connection from the DL1 to the computer. Connect the data logger to the DASH2.
step 7: Re-enter the "Start" menu, and navigate your way to the "DL1 Configuration" section.
step 8: To make sure that the serial connector is operating at a sufficient sampling rate, double click on the "Serial Port" space for "Analogue 1".
step 9: This will bring up a small window. Using the drop down menu, select an appropriate sampling rate and press "OK".
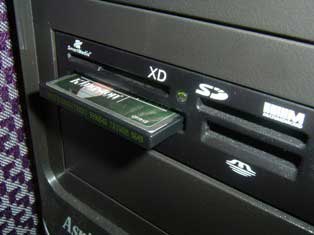
step 10: Having made sure that you have inserted a memory card into your computer,
press the "Save Configuration" button at the bottom of the "DL1 Configuration" window.
step 11: Navigate to the relevant place on your computer, and save the SETUP.BIN file to the memory card.
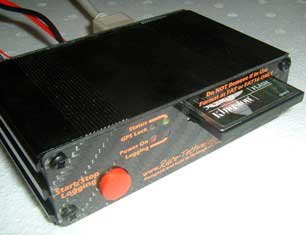
step 12: Now remove the memory card from the computer and insert it into the DL1.
step 13: Enter the "DASH2 configuration tool" and Select "Analogue 1", from the drop down menu in the upper, left hand corner of the window.
step 14: Further down the configuration tool window, you will find the "Scaling" section. Click on the "Use a standard sensor" button.
step 15: This will open a window. Use the drop down menu to select the sensor that you wish to use.
step 16: On the right hand side of the configuration tool, you will find the section that enables you to name the analogue channel (in this case an air temperature sensor was being used, so the channel was re-named "Air"). Below this, is an option to specify the number of decimal places that you want displayed on screen. Fill them in accordingly.
step 17: Now enter the "Setup screens" tab on the configuration tool. Use the drop down menus to ensure that the channel that you are using will be shown on screen.
step 18: When you are happy, click on the "Save Configuration" button at the bottom of the configuration tool window.
step 19: This will open up a window that allows you to save your configurations onto a memory card. The file that you are saving must be called "Dash.dat".
N.B If you are using the same memory card that you used earlier to configure the DL1, ensure that the previous file is deleted and that only the "Dash.dat" file is stored onto the card.
step 19: Once the file has been successfully saved onto the card, remove it from the computer and insert it into the DL1.
After a few seconds the new configuration will be transferred to the display and the sensor readings will be clearly visible