Virtual Dashboard designer
On this page:
Introduction
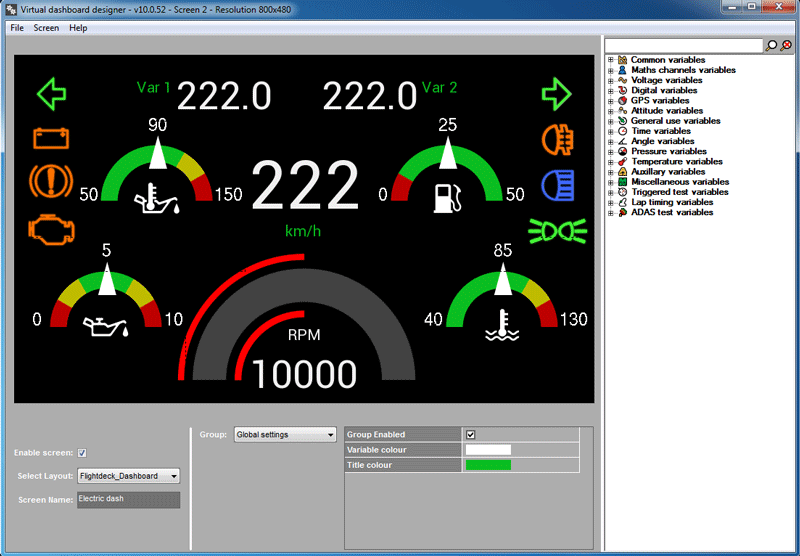
Virtual Dashboard is a highly versatile and easily configurable software dashboard with 10 data display screens. It is one of the latest features available with RT Analysis and Live Monitor.
Virtual Dashboard designer is the application used to configure the "Virtual Dashboard". It currently has more than twenty factory configured dashboard layouts which you can apply for many different applications (more layouts will be available with new software releases). The dashboard layouts can be further customized to display any of the variables within Analysis and Live Monitor.
Configuring Virtual Dashboard Screens
Dashboard screens act as containers which can hold dashboard layouts available with the software. Following step by step instructions show how to configure a blank screen.
Please note: When you make changes to the properties of screens and layouts, those changes effects virtual dashboards of both RT Analysis and Live Monitor.
| Enable a screen and applying a layout
|
| Step 1
| Load a screen to the design area using the Screen menu
|
|
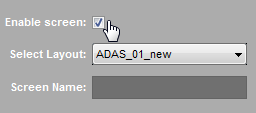
| Step 2
| Enable the screen (if not enabled)
|
|
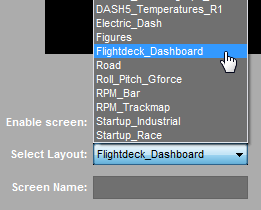
| Step 3
| Selecting a dashboard layout
Assign a dashboard layout to the blank screen using Select Layout drop down list
|
|
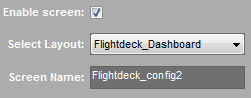
| Step 4
| Name the screen (Optional) - name can contain maximum of 32 characters
|
|
|
|
| Customizing layout properties
|
| Step 5
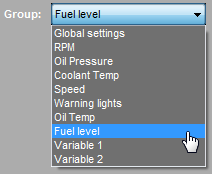
| Selecting a group to View and Change properties
A dashboard layout consists of data display controls (bitmaps, dials, bar-graphs, digital displays, track maps, dynamic lines, simple texts etc). The data display controls on a layout are grouped together based on the type of data they display. A group may contain one or more data display controls.
Select a group from the Group drop down list to view its properties. The selected group will be highlighted with a red square.
|
Selecting the "Fuel level" Group
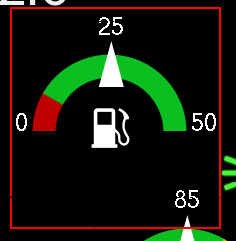
Fuel level" group properties
|
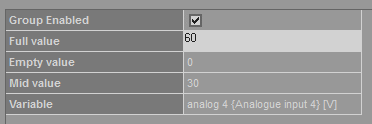
| Step 6
| Changing group properties:
Please note that available properties will vary based on the group.
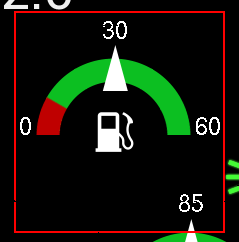
Change the "mid value" and "Full value" properties and check the Highlighted area in the design window.
|
Changing Mid and Full values
Design area reflects the changes
|
| Step 7
|
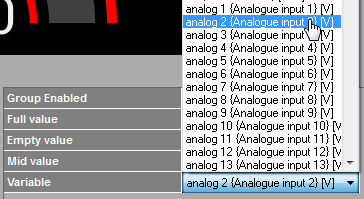
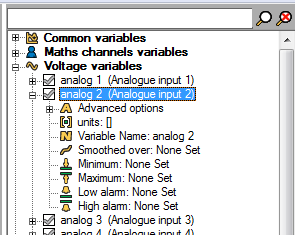
Changing the assigned variable:
You can change the variable assigned to a group in two ways:
- Selecting a new variable from the drop down list.
- Drag the variable from the variable tree and drop it onto the highlighted group.
You can further configure variable properties using the variable tree.
|
Changing the varialbe using the drop down list
Configure a variable using the variable tree
|