Virtual Dashboard designer
On this page:
Introduction
- Virtual Dashboard designer is the application used to configure the "Virtual Dashboard"
- Virtual dashboard is the software dashboard which you can open using either Analysis or Live Monitor applications. It consists of easily configurable/customisable 10 dashboard screens.
Assigning a dashboard layout to a dashboard screen
Dashboard screens act as containers which can hold dashboard layouts. Following step by step instructions show how to assign a layout to a screen.
1. Select a screen from Screen menu to load it to the design area
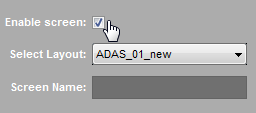
2 Enable the screen (if not enabled)
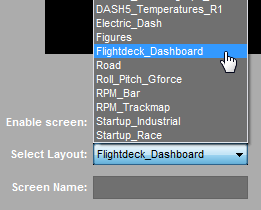
3. Selecting a dashboard layout
Assign a dashboard layout to the screen using Select Layout drop down list
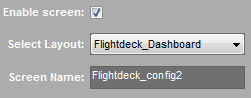
4. Name the screen (name can contain maximum of 32 characters)
Clearing screens and reassigning layouts
To clear a dashboard screen with a layout assigned:
- Select the screen using the "Screen" menu
- Use the menu command "Screen -> Clear Screen" to remove the layout.
Changing the order of dashboard screens
You can change the order of the dashboard screens by copying one screen to another. This helps you to change the screen order without loosing the customisation done to a layout.
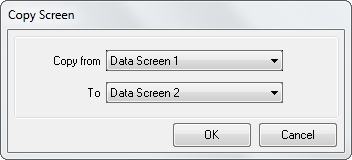
- Select the menu command "Screen -> Copy Screen" to open the "Copy Screen" dialog.
- Select "Copy from" and "To" screens and press OK to copy one screen to another.
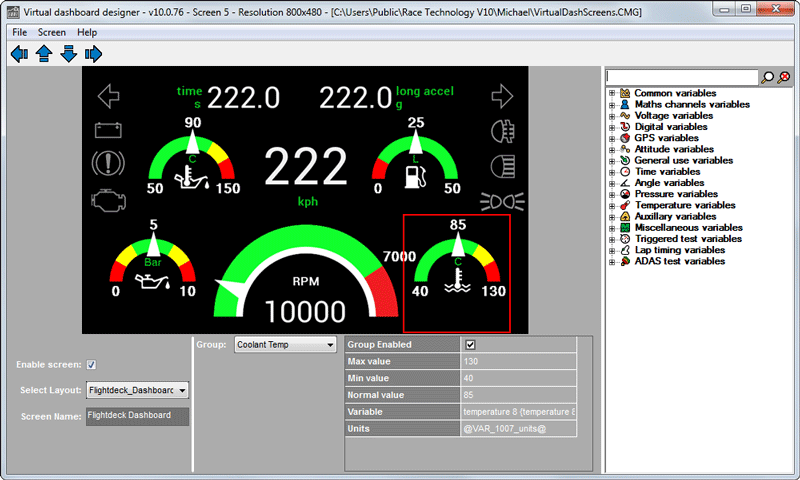
Customising dashboard screens
A dashboard screen is a container which can hold a copy of an layout (a dashboard overlay) assigned to it. Since you are using a copy of the original overlay, customisation done to the overlay using the virtual dashboard designer application has no effect on the original overlay.
Selecting groups to view and change properties
Groups can be selected using two ways:
- Selecting a group by clicking on it
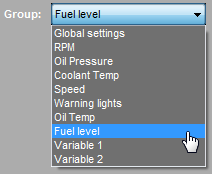
- Selecting a group from the Group drop down list
The selected group will be highlighted with a red square.
Moving groups and reposition them
There are two ways to move and reposition groups:
- Dragging the group to the desired location using the mouse
- Using the move controls (first select the group either clicking on it or by selecting it from the group drop down list)
Show/Hide groups
Groups can be made visible or hidden using group's "Group Enabled" property.
- If the group is currently visible, select it either using the mouse or from the "Group" drop down list
- If it is hidden, select the group using the group drop down list.
Changing group properties
Please note that available properties will vary based on the group and those properties are defined using the Advanced overlay editor.
Example:
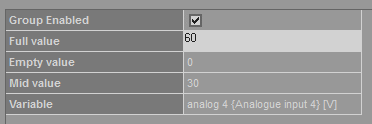
- Change the "mid value" and "Full value" properties:
Changing Mid and Full values
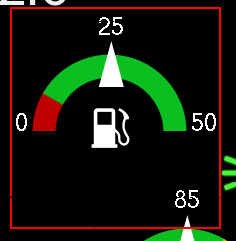
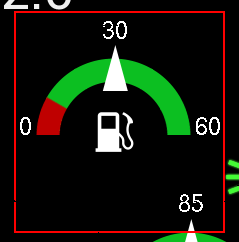
- The controls in the selected group will updated to show the changes:
Design area reflects the changes
Changing variables
You can change the variable assigned to a group in two ways:
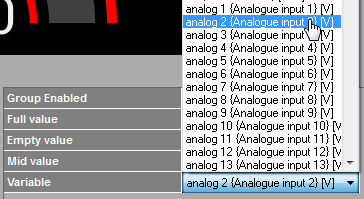
- Selecting a variable from the variable drop down list (in the group properties section).
Changing the varialbe using the drop down list
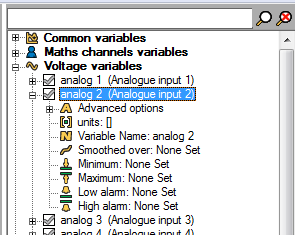
You can further configure variable properties using the variable tree.
Configure a variable using the variable tree