|
Call me back |
|

You are here: Website » Knowledge base
|
RTAnalysisVideoExport / ExportingVideoFromAVIDEO4WithGraphicsOverlayVideo Export Wizard
Following are some uses of the wizard:
Please note the following:
The Video Export Wizard consists of 5 steps:
1. Selecting a run file and overlay file
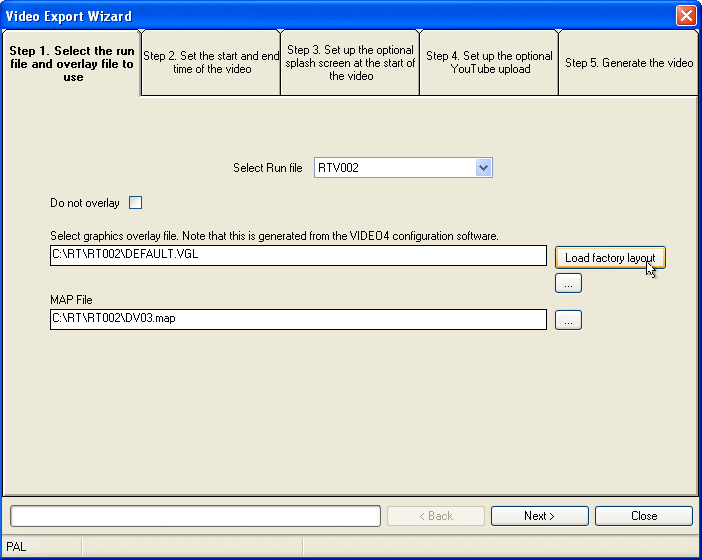 "Select Run file" combo box lists down run files loaded into the Analysis. First select a run file from the list.
Note: Lap timing variables do not work the same when using the layout (VGL - Video Graphics Overlay) for post processing. The differences are mainly due to what information is available in real time and after the run is complete. More information on this is available here.
 If selected VGL file contains a track map object with internet map overlay enabled, then you can select the map file which can be generated from Map file generator software. If you don’t have a map file, then the system will generate the map file automatically, if the software has access to the internet.
2. Set the start and end time of the video
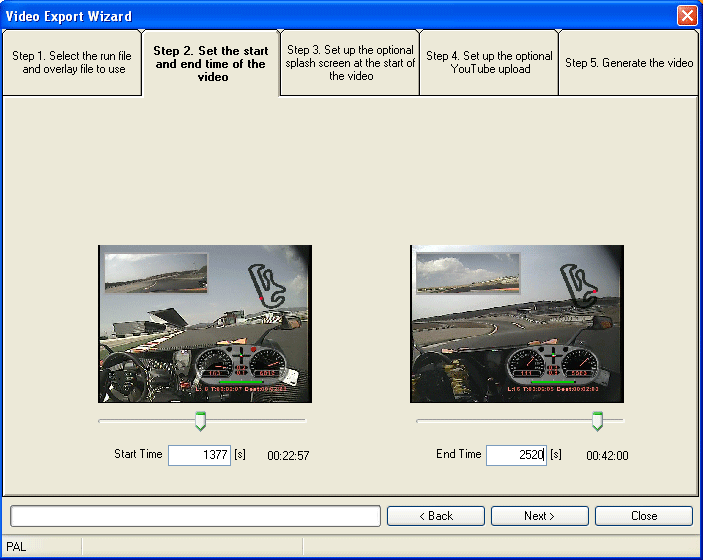 In this step you can defined the start & end time of the video. This will help you to export part of the video file.
3. Set up the optional splash screen at the start of the video
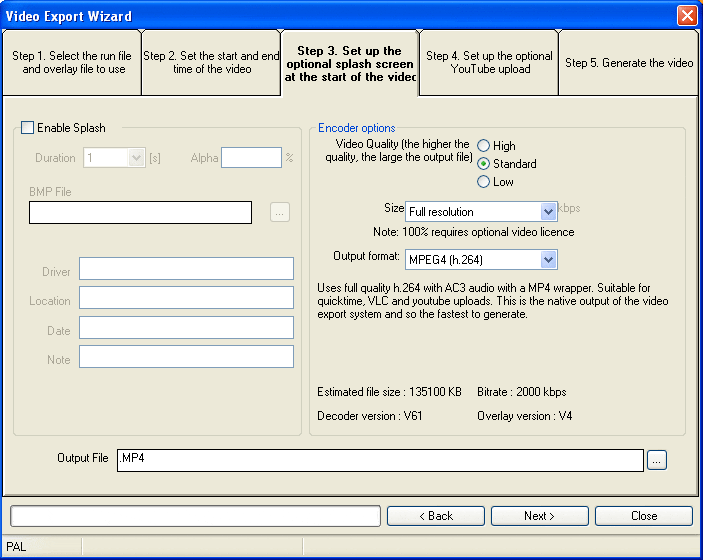 This step is used to configure startup splash image, encoder options and output path. Enable SplashThe splash image displays at the beginning of the video and you can define the duration and alpha factor (0 to 100%) with other details like driver, location, data etc… these details are also displayed on the splash screen. Encoder OptionsIn the encoder options you can define the video quality, size of the output video and the output format. Following are the output formats currently supported:
Uses full quality h.264 with AC3 audio with a MP4 wrapper. Suitable for quicktime, VLC and youtube uploads. This is the native output of the video export system and so the fastest to generate.
This is the format natively used by all Race Technology tools. It is MPEG2 broadcast format with MP2 audio. As well as being compatible with RT software, it can also be used to generate DVDs directly and be used in any 3rd party PC based DVD players (e.g. Nero, PowerDVD). It can also be used in Windows Media Player on most PCs. Not compatible with VLC player.
This is the preferred format for all Windows applications, including Movie Maker, Windows Media Player. Will also playback in VLC. Not suitable for Quicktime.
This is an older, less efficient CODEC format used by DV cameras. This is still very popular with professionals and compatible with most video editing packages. Note that for good quality, a high bit rates is required and this is fixed by the standard at about 20Mbit/s.
This is fixed resolution (320x160) video export encoded as h.264 tested to work directly with iPods and iPhones. The resolution setting has no effect in this export mode
This is very similar to the VD4 (MPEG2) format, but uses the MPEG2 transport stream with P frames only for maximum compatibility at the expense of slightly higher bit rates. Ideal for use in most video editing packages and more compact than DV mode.
The video quality is associated with the size of the video. Bitrate and the file size of the output video will be displayed on the Estimated file size and Bitrate labels. Output pathWhen you select the output path using the Output file text box, make sure that enough space (Estimated file size) is available on the selected drive. If you select a removable drive, system will give you warning saying that "it may cause speed and stability problems".
4. Set up the optional YouTube upload
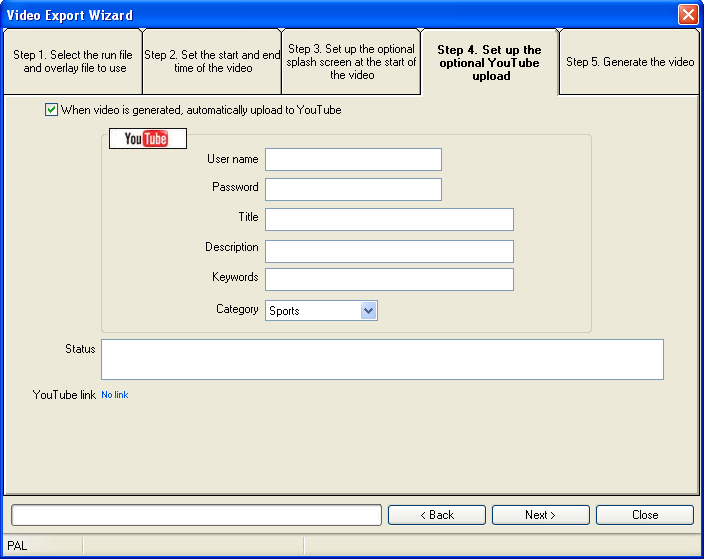 In this step, you can configure required details for uploading to the YouTube website. Before uploading content to the YouTube, you should have a valid user name and a password for login. To register with YouTube click on the link: http://www.youtube.com/create_account Then enter title, description, keywords and category of the video and these information are needed for YouTube to categorize your video. If you select When video is generated, automatically upload to YouTube option, system will start uploading after generating the video. After a successful upload, preview link will be displayed on YouTube link. (at the bottom of the step 4 window) Please note that there are few limitations on YouTube videos: Video file sizes should be no larger than 2GB and no longer than 10 minutes in length.
5. Generate the video
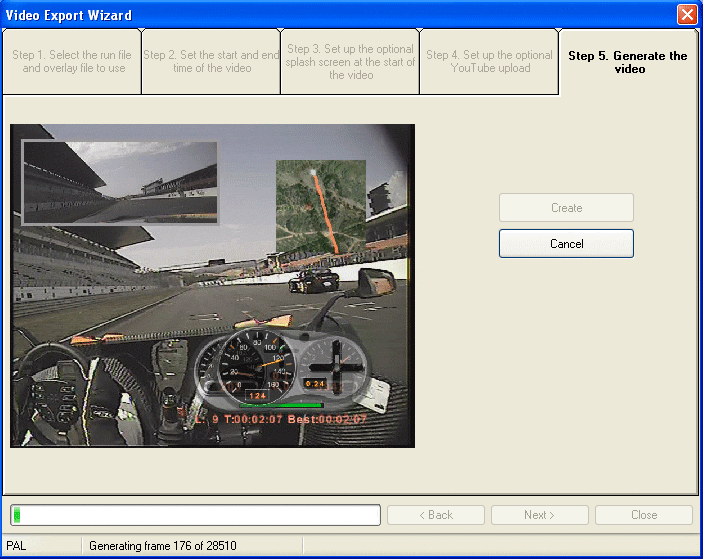 After configuring the options in the above four steps, press “Create” button to start the video generation. Press “Cancel” button to abort the operation. |