How do I set an alarm level on the DASH2?
step 1: Enter the DASH2 configuration tool. It will automatically open onto the "Input Scaling" screen.
step 2: In the top, left hand corner of the window, underneath the picture of the DASH2 display, you will find a drop down menu that allows you to select which channel you wish to alarm.
step 3: Now, using the "Alarm limits" section on the left hand side of the window, set the high and low thresholds that you wish to trigger the alarm. In this example, the high threshold is set at seven, and the low is set at two.
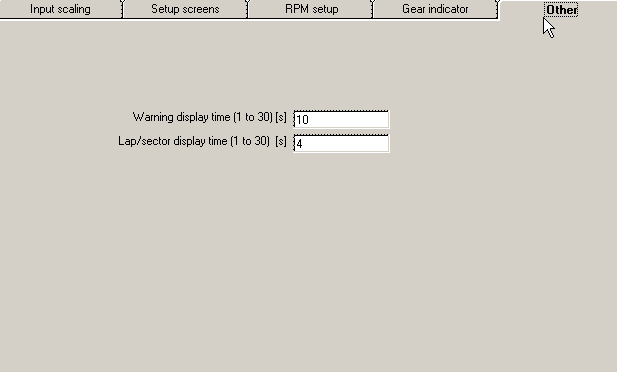
step 4: To set the length of time that the alarm is displayed on screen for, click on the "Other" tab at the top of the window. You will now be able to set the warning display time to anywhere between one and thirty seconds:
step 5: When you are satisfied, re-configure the DASH2.
When the readings dip below the low threshold, the alarm will be triggered. On top of the DASH2, the second LED from the left will illuminate, the words "LOW LEVEL" will be displayed, and the reading at which the alarm was triggered will appear in large digits on the right hand side of the screen. This warning, in the example given, will remain on the screen for ten seconds.
Again, a similar warning will be given when the readings exceed the higher threshold. This time, the words "HIGHER LEVEL" will appear along the bottom of the screen.
Once the warning has been displayed for the required time, it will cease to appear on the screen. This does not mean that the readings are no longer beyond the alarm thresholds. No alarm will be displayed again until the next time that one of the thresholds is crossed.