Exporting video with data overlay..
The system is very flexible and within the output video you can:
- Change the format of the output video to your exact requirements using a definition file
- Unlimited multiple copies of each of the 10 camera views can be displayed simultaneously
- Unlimited number of anti-aliased analogue dials, digital displays
- Incorporate alpha blended graphics of any shape
- Encode the output file using any codec available on your machine
As stated the output video file can be set up to the users exact requirements. Alternatively you can select one of the pre-defined overlays. The process of exporting a video file is very simple. To start, go to > File > Export As Video... and you should see the following window:
If you see a message saying "There is no video file associated with camera 1", then you have not imported the video file. The Setup tab on the Output Video Generation window has the following options:
Here you can choose which run, the time you start and finish exporting to and from (you can click the Export Highlighted Section button, and that will take the times from the highlighted section. Please note that if you have more than one cell highlighted on the Lap And Sectors Time (or elsewhere) it will be the last section you highlighted that the video uses. The Export Entire Run button just sets the start time to 0 and the end time to the last possible point from the data.), the output video file name and the output settings. You can also select the overlay the video uses.
The Output video to file option is very important. If you do not check this box, the Generate button on the Generate tab will only preview what the video output will be! To set up your video, make sure you have done the following:
- Synchronise the video
- Select which run you wish to generate a video for
- Set the start and end time over which you wish to generate the video on the setup tab of the video generation window
- The template you wish to use
- The number of frame per second for the video by the Frames/Second slider (1-30)
- The CODEC you wish to use to encode the video
- A file name for the video
- Selected whether you want to preview the file during generation
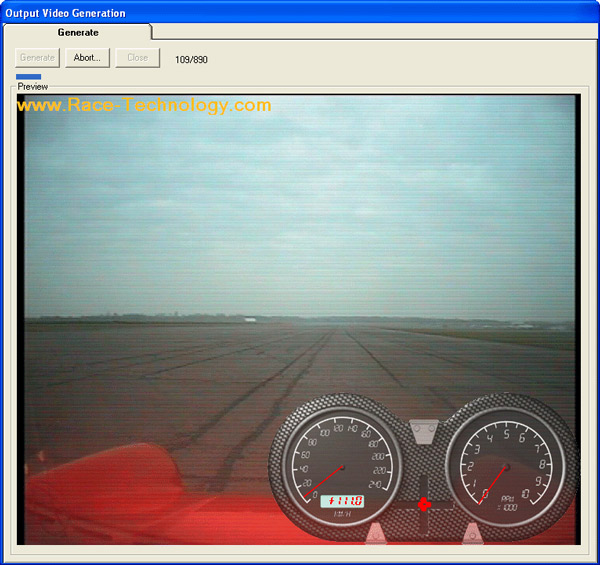
Once you have set up the video how you want to, go to the Generate tab and from there you can set the process working, and watch in real time. You will also see a status indicator, counting how many frames have been exported: