Controls
On this page
Inserting a Control
There are four ways to add a control to the design window.
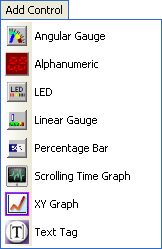
1. Add Control Menu
|
|
The first way is via the Add Control menu. This menu lists all of the available RT Controls. Once you click on a control, it will be inserted in the design window at the (0, 0) co-ordinate. You may then use the handles to resize the control and move it to the position of your choice.
|
2. Right-Click on Design Window
|
|
|
The second way is by right-clicking on a blank area in the design window. A sub menu containing a list of available RT Controls will be appear. You may select one of them. The control will be automatically placed in the spot where the mouse was clicked.
|
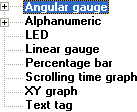
3. Controls Tree View
|
|
The third method is via the Controls Tree. The main node represents the pre-defined RT control, whereas the sub-nodes represent controls that have been defined by the user. The user can drag these nodes from the Control Tree and drop them into the design window.
|
4. Control List
 |
| Alternatively, the user can use the Controls List menu to drag and drop controls into the design window. The controls are placed where the mouse pointer drops them. |
Deleting and Editing Controls
See the Pop up Window section.
Pop-up window on Controls
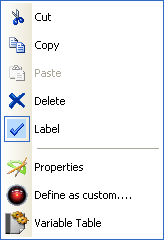
This pop-up menu will appear if the user right-clicks on a control in the design window.
Cut
When clicked on, this option will allow you to remove an object and store it to memory so that it can be "pasted" into another part of the design window. Please note, the set of variables assigned to the current control will have to be re-allocated when it is pasted.
Copy
Similar to "Cut". Instead of removing the control however, a copy will be made of it that can be pasted elsewhere. i.e. the current control does not get deleted but only copied to the new location.
Paste
Allows you to "Paste" an item that has been cut or copied.
Delete
Allows you to delete a current control (Note: no confirmation dialog is shown).
Label
Allows you to turn labels on and off. The label will display the highest variable that is assigned to it.
Properties
Allows you to customize the current control by using a set of different options.
Define as custom
You may add a control that you have configured to the control list for future use. Ensure that you provide a unique name for the control. The Control tree and List will be updated instantly.
There are two ways to remove a custom control. You may press the delete button when the control is selected in either the Control tree or the List. You will be asked for confirmation of this removal.
Variable Table
Opens the Variable Table and allows you to assign the variables to inputs of the current control. For more details on assigning variables click here